Смяна на крушка на Фиеста мк6(дясна)
-
mokelembembe
- потребител

- Мнения: 5
- Регистриран: 14 ное 2010, 00:35
- Модел на автомобила: S3
- Status: Извън линия
Смяна на крушка на Фиеста мк6(дясна)
Как се сменя крушката на десния фар на Фиеста 2003 година? Също така какъв тип е крушката? Какво трябва да се разглоби за да се достигне до пластмасовия капак на крушката?
-
Pyrhel
- потребител
- Мнения: 1559
- Регистриран: 12 авг 2010, 20:51
- Модел на автомобила: няколко други марки +
Mondeo Titanium X 2.2 TDCi - Местоположение: София
- Контакти:
- Status: Извън линия
Re: Смяна на крушка на Фиеста мк6(дясна)
Крушките в моята кола
Има вероятност да трябва да се махне фара, за да се смени крушката. Огледай дали има едни Г-образни планки, които го държат. Ако има - маха се фара. При мен, за да се махне фара трябва да се махне и предната решетка, имах го предвид и това
Има вероятност да трябва да се махне фара, за да се смени крушката. Огледай дали има едни Г-образни планки, които го държат. Ако има - маха се фара. При мен, за да се махне фара трябва да се махне и предната решетка, имах го предвид и това
-
cenzor

- потребител
- Мнения: 3143
- Регистриран: 30 авг 2006, 20:28
- Модел на автомобила: Fiesta MK6 2004 1.3i/70hp
- Местоположение: СОФИЯ
- Контакти:
- Status: Извън линия
Re: Смяна на крушка на Фиеста мк6(дясна)
Сваля се целия фар, има три болта на него.
Около 10 минути отнема първия път, после е по-лесно.
Около 10 минути отнема първия път, после е по-лесно.
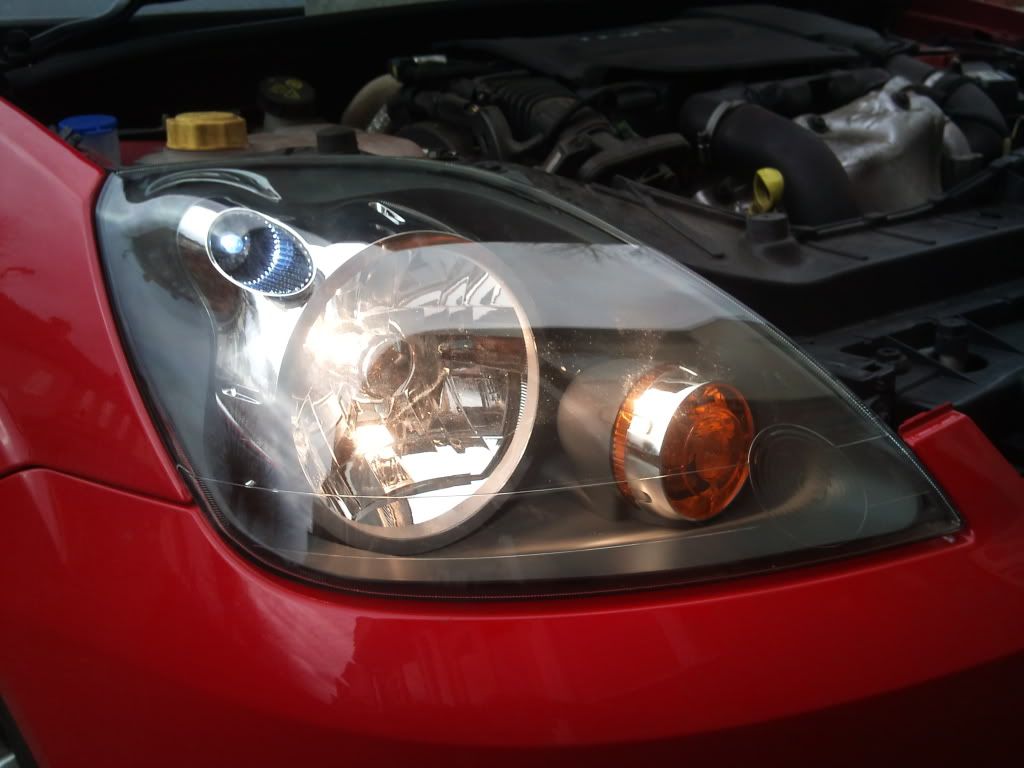
k6 Fiesta - Headlight and bulb replacement.
Replacing/changing your headlight bulbs. A first of hopefully many guides from me for the Mk6 Fiesta.
Note:This guide is based on a facelift mk6 ZS/ST and may be slightly different for the pre-facelift Non ZS/ST models as I know the grille is a different fitting.
Tools required:
T30 Torx bit & Ratchet
10mm Spanner
Bulb types:
Headlight- H4 (472)
Sidelight- 501
Due to restricted access to the bulbs on the Mk6 headlights you have to remove the headlight to change them.
Firstly disconnect the negative terminal from the battery before working with any electrics on the vehicle, for this you will need a 10mm spanner.
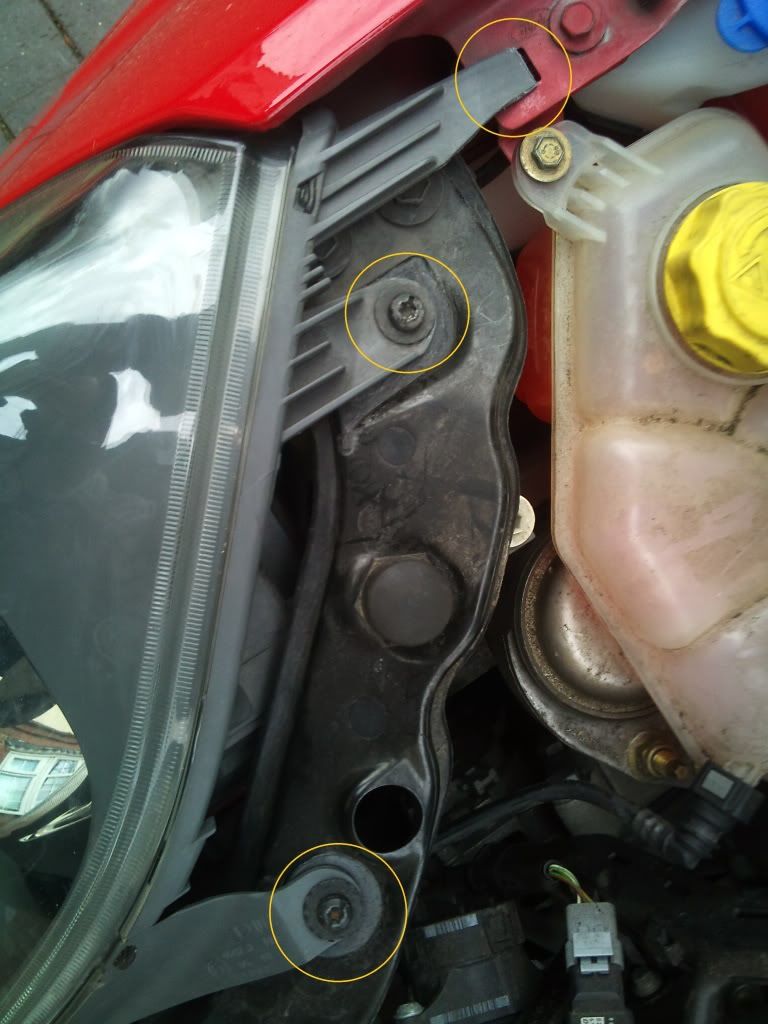
Locate and remove the headlight fixing screws and clips, most of these are easily accessible from the top and highlighted in the pic below.
(Posted Image)
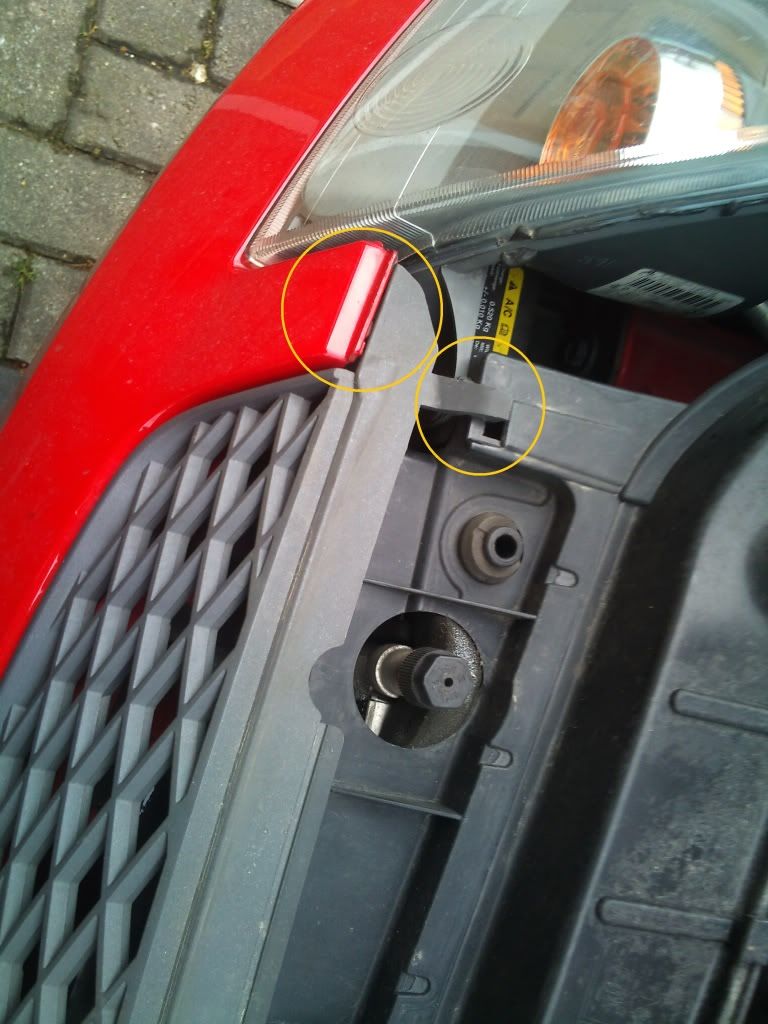
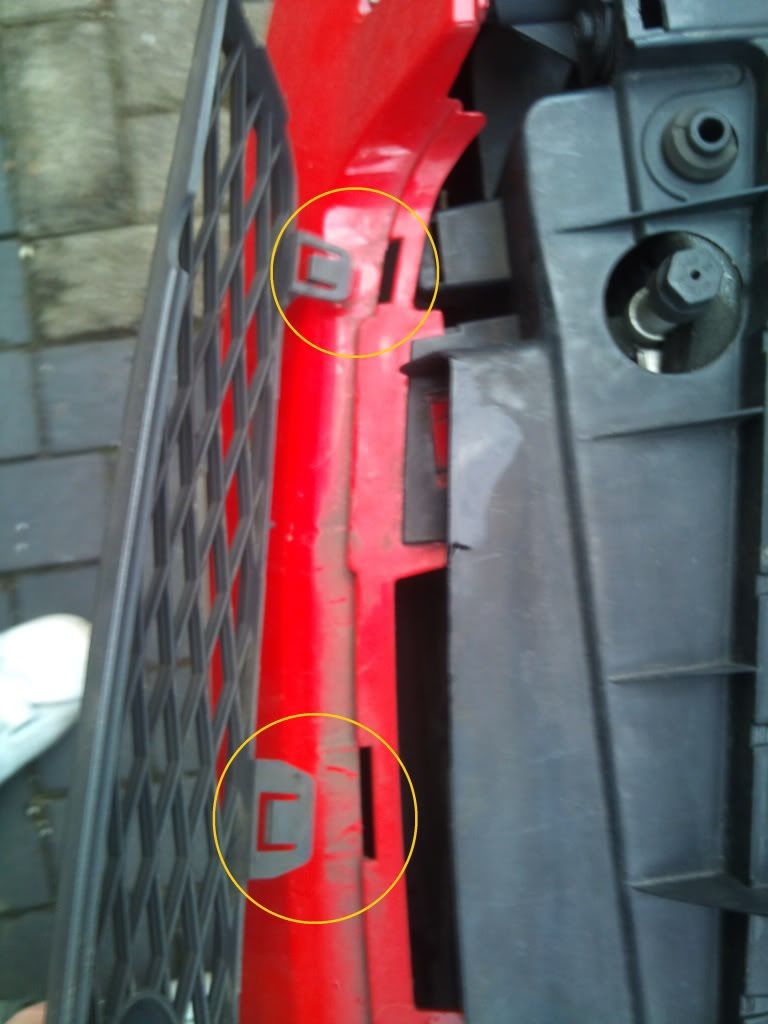
To get to the final fixing screw you will need to remove the grille by unclipping it from the points shown below (on both sides) and carefully pulling it up.
(Posted Image)
(Posted Image)
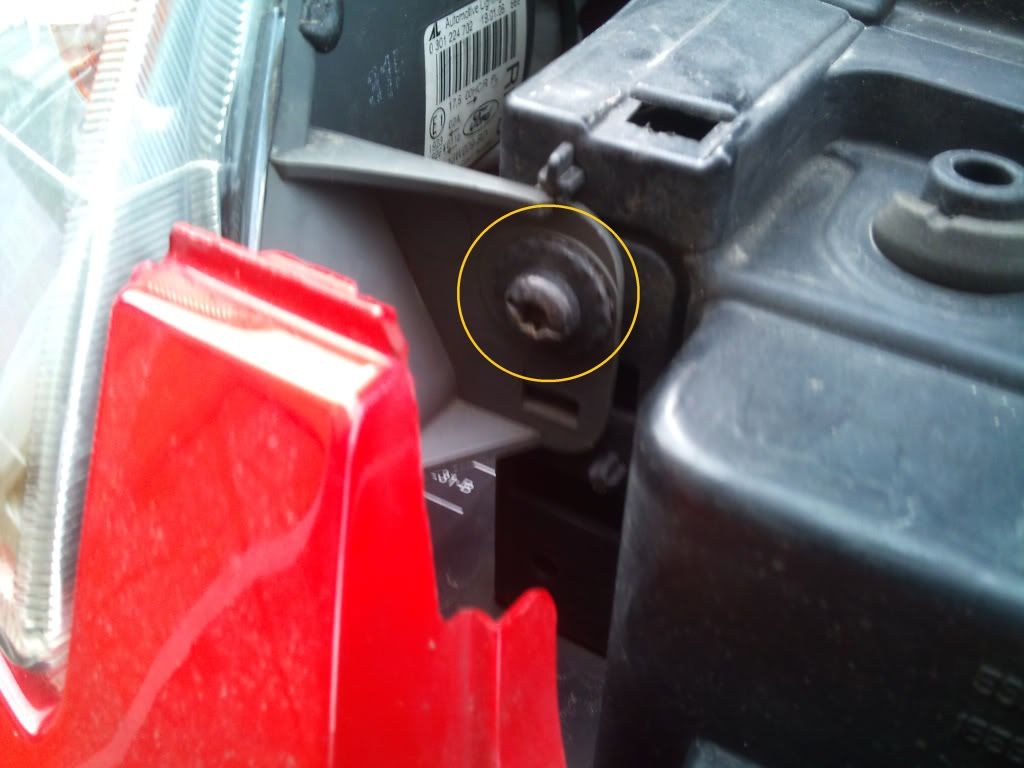
You should now be able to see/access the screw.
(Posted Image)
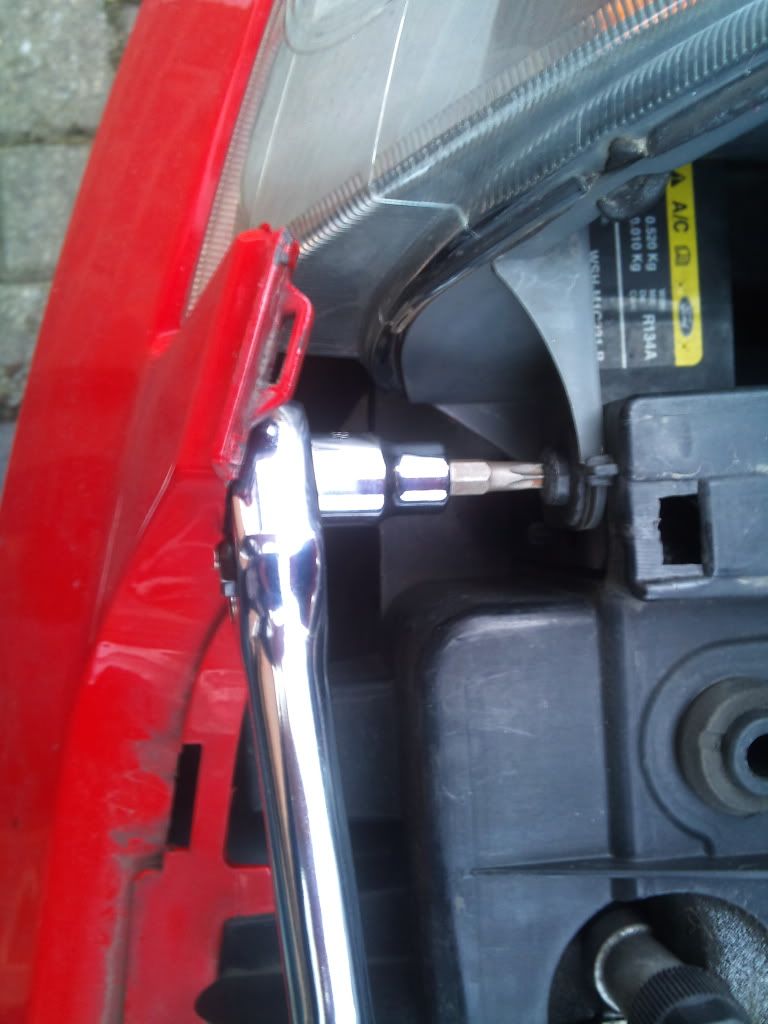
Remove this and the other screws using a T30 socket and ratchet (or equivalent). To get the ratchet onto the front screw you may have to pull out the top of the bumper out carefully so as not to damage it.
(Posted Image)
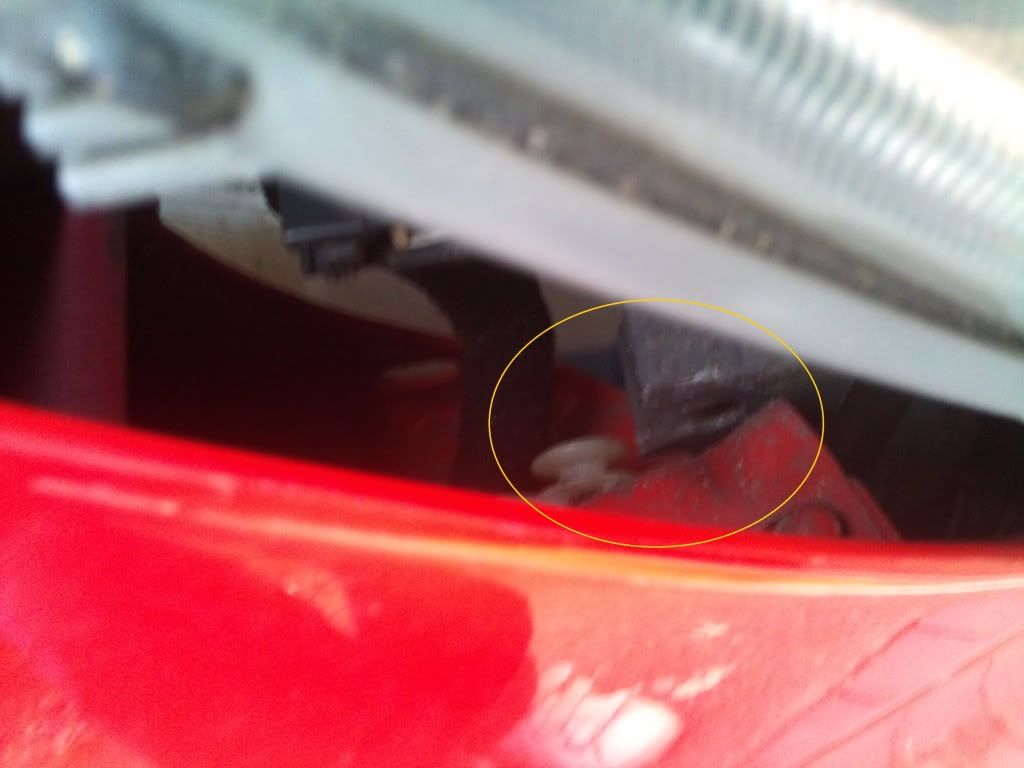
Once all screws are removed the headlight should now be slightly loose but needs to be unclipped from the side (wing) this can be done by carefully pulling the headlight forward until it comes free of the clip shown below.
(Posted Image)
You now need to try removing the headlight a little further by lifting it up at the front and pulling forward (and may require a bit of wiggling to get it out over the bumper in the corner where the front screw goes) until u can get to the wiring connector (at the wing side) shown here.
(Posted Image)
Unplug this by pushing the little tab in and pull. You should now be able to remove the headlight easily and left with this (took this pic to show the position of the wiring connector and headlight clip on the back of the wing).
(Posted Image)
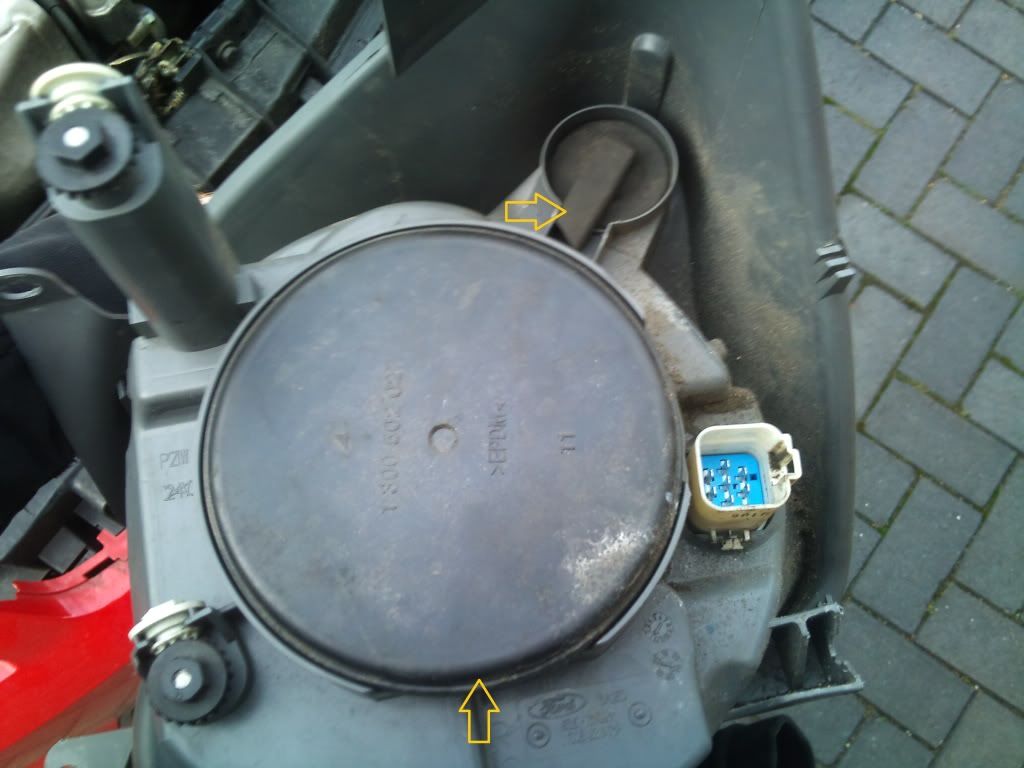
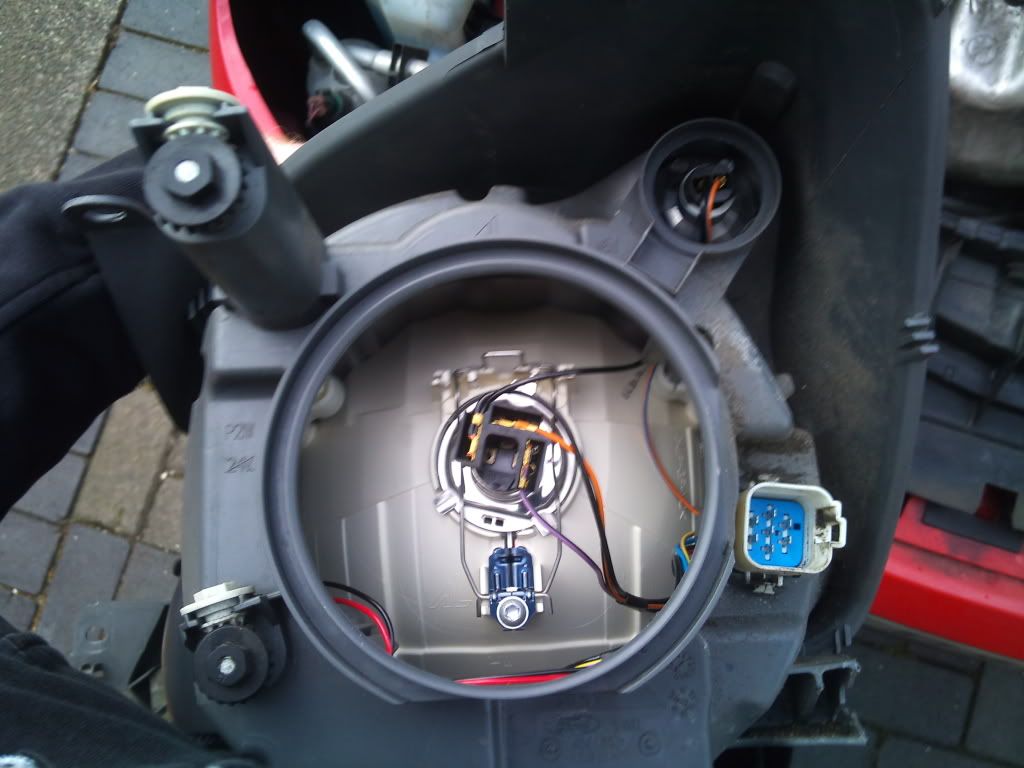
Now you have removed the headlight you can change the bulbs. You will see 2 rubber covers on the back which you need to remove to get to the bulbs. This is done by pulling them at thr points shown by the arrows.
(Posted Image)
Which leaves you with this.
(Posted Image)
To change the headlight bulb you need to pull off the block connector from the back of the bulb, squeeze & twist the hinge clip at the top and swing it over, the bulb should now be free to remove and replace with a new 1. Hinging the clip back over until it click back into place and refitting the block connector. (Pic shows the block connector removed)
(Posted Image)
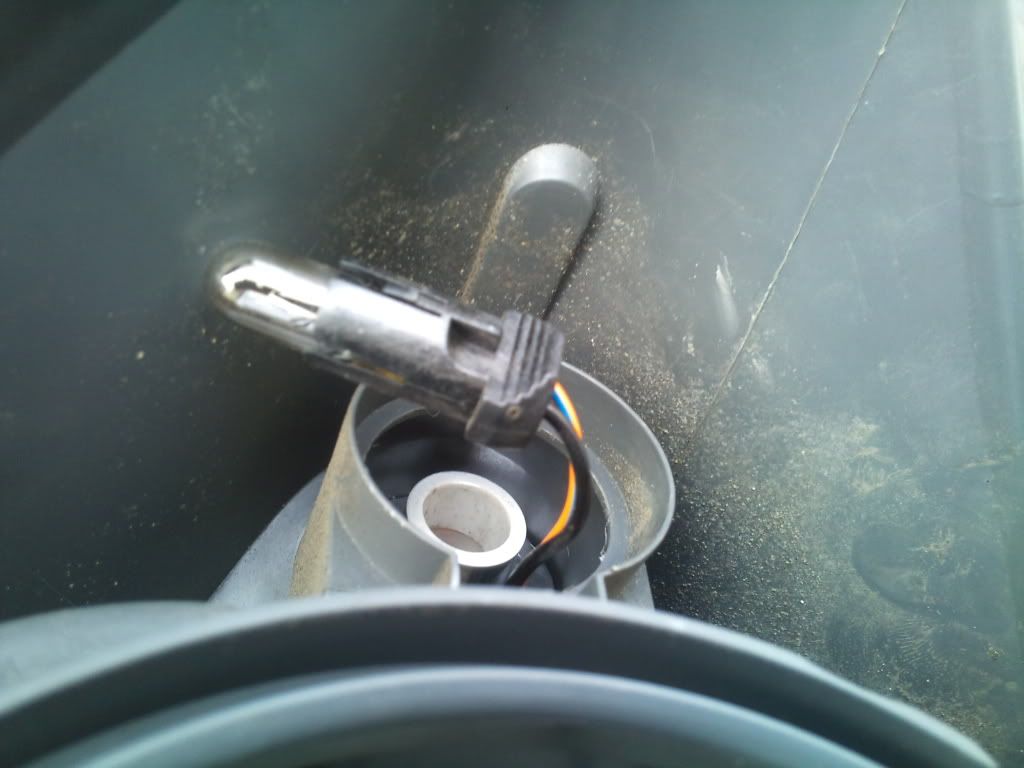
Now to change the sidelight, simply pull the plastic holder out of the headlight.
(Posted Image)
Remove the bulb from the holder by pulling it out carefully without breaking the bulb and replace with new 1 pushing the bulb holder back into the headlight when done. (Note: If fitting LED sidelights they only work 1 way around due to the polarity so it’s best to check they are the right way round before fully refitting the headlight unit back to the car.)
Place the rubber covers back on the headlight and refit to car using the opposite method to removal.
Repeat process for other side if required.
Re-connect the battery and test all lights and electrics work as they should.

Не отговарям на неграмотни постове.
-
mokelembembe
- потребител
- Мнения: 5
- Регистриран: 14 ное 2010, 00:35
- Модел на автомобила: S3
- Status: Извън линия
Re: Смяна на крушка на Фиеста мк6(дясна)
Благодаря колеги, сменя се точно както е писано, даже не се налагаше да свалям решетката и не отнема повече от 10на минути. 
-
howwedo

- потребител
- Мнения: 3
- Регистриран: 24 апр 2011, 16:13
- Модел на автомобила: Ford Fiesta Mark VI
- Местоположение: София
- Status: Извън линия
Re: Смяна на крушка на Фиеста мк6(дясна)
Добър ден !
Вчера ми се наложи и на мен да ги сменя.
Пробвах по описаният начин, но предната решетка, където е емблемата на форда е като залепена. Пластмасата седи като стопена, не знам. Отделно долу същата решетка е захвната с някакъв болт
 Това нормално ли е?
В крайна сметка си ги смених, без да свалям фара. Само на десният ми се наложи да откача антифриза. Малко бъркане и играчка и стана.
Искам следващият път да си ги направя както трябва. Въпроса ми е защо предната решетка ми създава такива проблеми
Вчера ми се наложи и на мен да ги сменя.
Пробвах по описаният начин, но предната решетка, където е емблемата на форда е като залепена. Пластмасата седи като стопена, не знам. Отделно долу същата решетка е захвната с някакъв болт
В крайна сметка си ги смених, без да свалям фара. Само на десният ми се наложи да откача антифриза. Малко бъркане и играчка и стана.
Искам следващият път да си ги направя както трябва. Въпроса ми е защо предната решетка ми създава такива проблеми
Кой е на линия
Потребители, разглеждащи този форум: Няма регистрирани потребители и 13 госта
